This screen allows you to select which contacts (customers, prospects and suppliers) to include mail-merge.
Indicate which records the criteria should be applied against. The criteria can then be used to limit the records that are returned.
Accounts to apply |
Select which accounts the filter will be applied against Load customers, Load prospects or Load suppliers |
|---|---|
Account code range |
The account code starting and ending range that should be filtered |
Address 1 - 5 |
The returned data can be filtered based on the address details; if you have captured addresses in a specific way, you can filter on the town, country, and postal code if your addresses are captured correctly. |
Sales Category |
For customer and prospects, you can limit based on the sales category code assigned |
Purchase Category |
For suppliers you can limit based on the purchase category code assigned |
Once the selections have been made, press the Load Accounts button to retrieve all the account details that match your entries. Once the records have been retrieved, the records can be limited further based on sales, user-defined contact codes etc.
The number of records included in the mail merge is displayed in the green indicator.
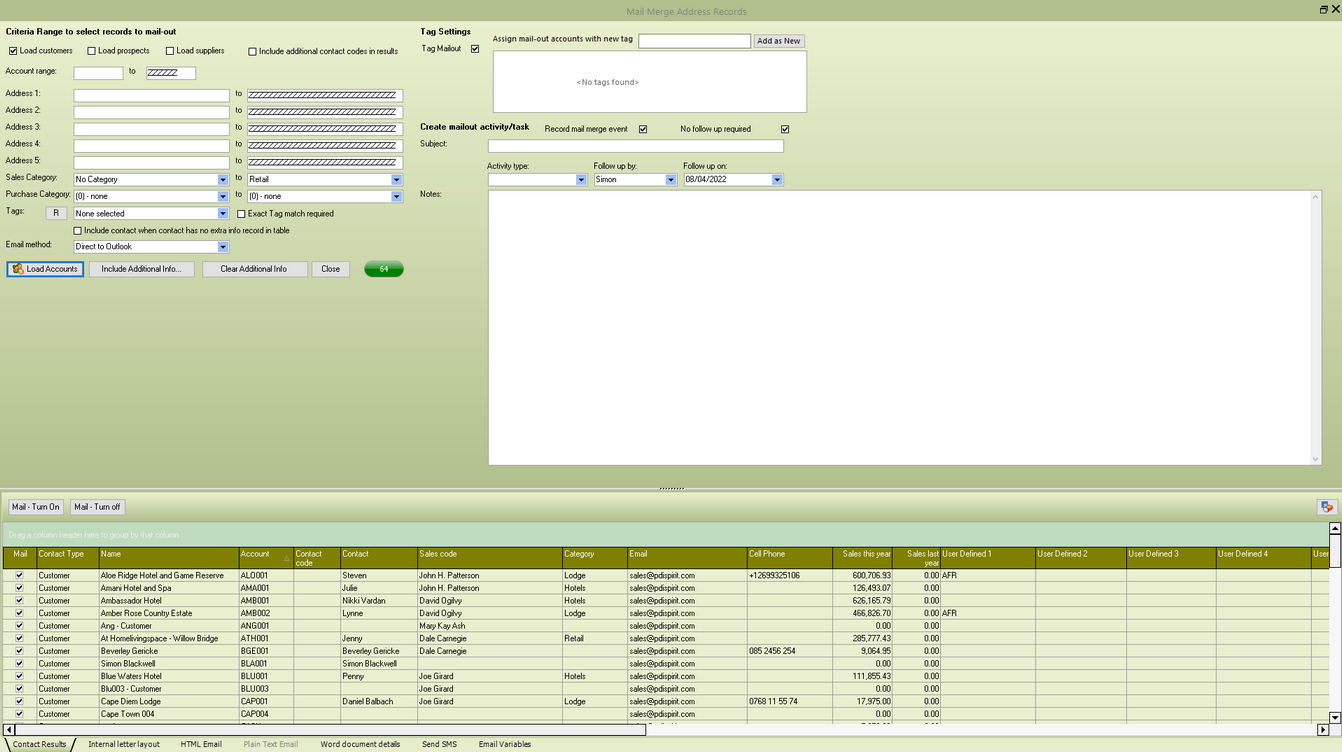
If required, the user can select that the mail merge is recorded as an event for future follow-up. Tick the Record mail merge event check box and complete the available fields as required.
Subject: Brief details of the event for quick reference within a grid view
Activity type: Select the activity type this activity/event should be assigned to
Follow up on: Enter the date that this event should be followed up on; if the No Follow up required is not ticked:
Notes: Enter any generic follow-up notes as required; for example, this could include details of the purpose of the mail merge
Internal Letter Layout
This function will generate a mail merge with the selected records using a PDI Internal Report layout. This can be easier to generate than a Mail Merge if you have Word and security settings issues.
Report name: Select the FR3 (PDI Report layout) file you wish to use in the mail merge. Using the Design button, you can use the crmMerge_letter.fr3 as a starting point and make changes as required. This will load the report in the designer, allowing you to change the text of the letter, layout etc.
Save PDF output: Enter the PDF filename that you wish to save the output to
[Design internal letter/label...] - this will allow you to create and design the required labels or letters to be sent to the mail-merge list
[Start mail merge Internal letter...] - this will start the process of creating the letter based on the selected customers
HTML Email
This section allows you to send an HTML email - this is only available when you send emails via SMTP.
Email Subject - Enter the subject that should appear in the emails
HTML Layout - This should be created using your favourite HTML designer. You can include images and variables available to the mail-merge to customise and personalise your mail-out (See the Email Variables tab)
[Add Attachment] - add attachments that you wish to include in the email
[Start Email merge] - this will start the process of sending the email merge
Plain Text Email
This section allows you to send a plain text email using your MAPI client. This will only be available if you are not sending emails via SMTP.
Email message: Select the file containing the plain text email you wish to send. This can include variables to customise and personalise your mail-out (see the Email Variables tab)
Email subject: Enter the email subject that you wish to appear on the emails
[Design/Load plain email text...] - this will load the filename entered in the email message box, allowing you to edit the layout and add the required variables
[Start Email merge] - this will start the process of sending the email merge
[Add Attachment] - add attachments that you wish to include in the email
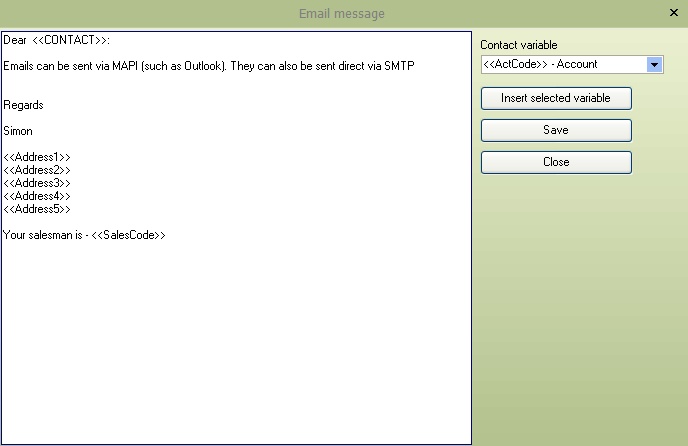
Email Message plain text
This screen is displayed when the [Design/load plain email text...] button is pressed. Enter your text as required, and insert the Contact variables as required. If you are processing it as HTML files, this can be a pure HTML file, including the merge variables as required. We recommend creating your HTML output within an HTML designer and then copying and pasting the HTML into the email message.
When creating a HTML Document, we recommend that you only include the <html><body></body></html> tags, the normal HTML format will include a <head></head> section which can cause problems when the email is received in clients such as Outlook. Limit CSS styles to a minimum as some email clients will block the email completely. Keep images external, and make good use of tables for layout design, as not all email clients will read your CSS files correctly.
Email Variables
This tab will list all the available codes used within the HTML and Plain emails.
NB: Please note that with version 4.4.0.3, variable fields changed from <<Field>> to {%Field%}